

How To Set Up Recurring Ach Payments In Quickbooks Online
Recurring ACH Transaction
If you already use QuickBooks Payments in QuickBooks Online, you know y'all can easily have credit bill of fare payments. (If you don't use QuickBooks Payments withal, Signup hither) Only those credit carte fees can add upward, especially for recurring sales.
Now you tin can process banking concern transfers (besides known as ACH transactions or eChecks) for a lower fee of 50 cents per transaction!
And since you enter each customer'due south banking concern info direct into QuickBooks, QuickBooks takes care of the bookkeeping and saves you time. Yous tin can stop processing eChecks in the Merchant Service Center and copying the details over to QuickBooks.
How ACH bank transfers work
First, signup for QuickBooks Payments. And then:
- Select the Bank check or ACH payment method every bit y'all create a 1-time or recurring sales receipt or as yous receive a payment.
- Enter your customer's banking concern info.
- Get potency from your customer. You tin read them a script or accept them fill up out a form.
- Process the transfer and get paid!
The remainder of this article goes through each stride in more particular.
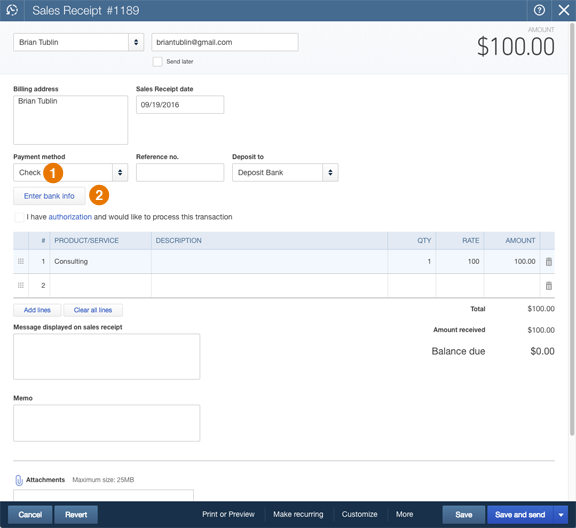
Pace 1: Select the payment method
Starting from the Receive Payment, Sales Receipt, or Recurring Transactions page, select the  Bank check payment method so that the
  Enter banking concern info push button appears.
Or if you add a new payment method name such as ACH, Bank Transfer, eCheck, Banking concern, or Transfer and select it, an Enter bank info button appears in those cases, too.
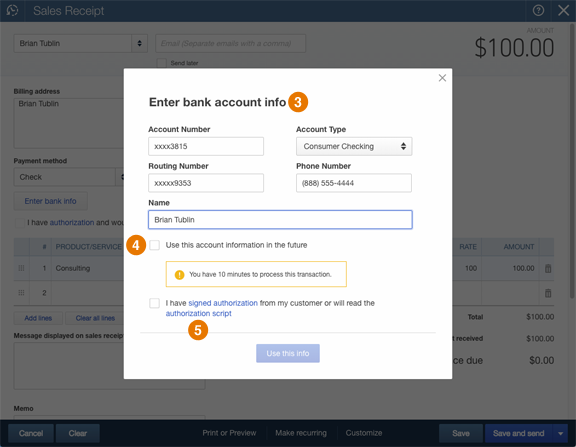
Step ii: Enter depository financial institution info
Click Enter bank info and fill up out your client'south  bank account info, telephone number, and proper name.
If you clear the  Use this business relationship information in the hereafter box, you'll need to process the transaction within ten minutes for your customer's security.
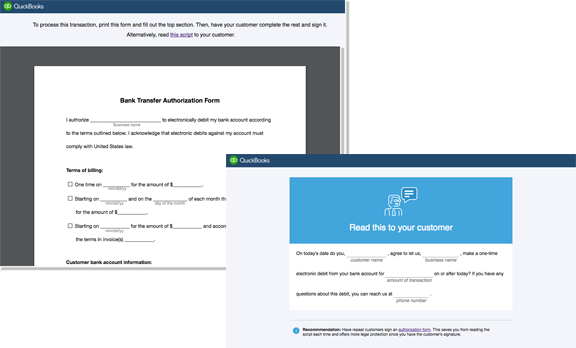
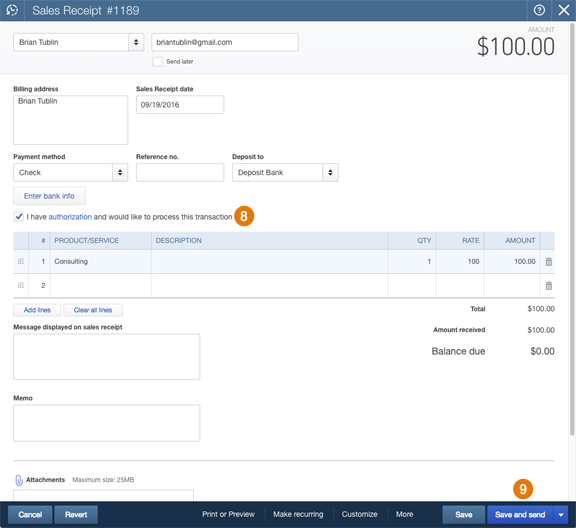
Stride iii: Get authorization
Whether you save the account data for the future or not, you still need to ask for authorization from your customer.
Click one of the  text links to open the authorization form or script.
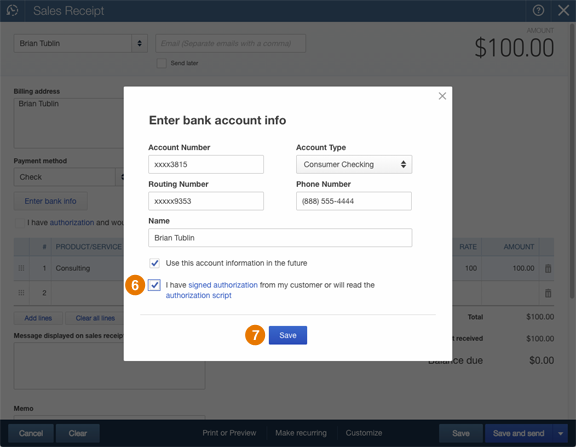
Step 4: Procedure the payment
Close the authorisation form or script and select the  I accept signed authorization checkbox to prove yous've received dominance.
Click  Salve.
Finally, back on the main form, select  I take authorization and would like to process this transaction and click
  Save and send.
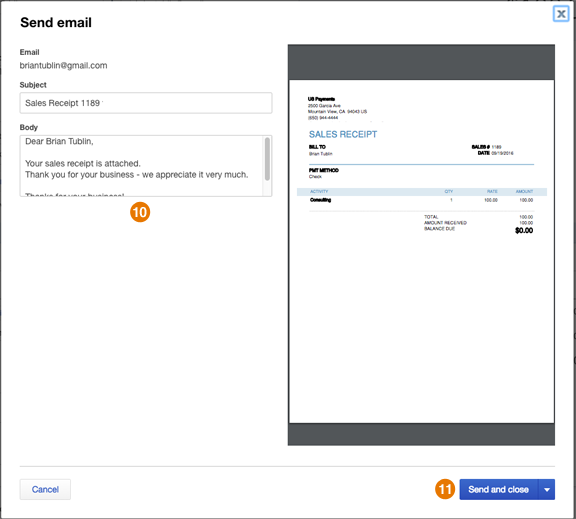
Make any changes to the  electronic mail message to transport to your client and click
  Save and close.
You'll get a receipt confirming that the payment is on its mode! Plus, QuickBooks automatically records the payment to keep your books up to date.
Share This Story, Choose Your Platform!
Source: https://blackrockbusiness.com/quickbooks-online-recurring-ach-transaction-echeck-bank-transfer/
0 Response to "How To Set Up Recurring Ach Payments In Quickbooks Online"
Post a Comment